 Michael Torres
Key Takeaways
- Empty the grease cup every two or three cooks, or when it is more than half full.
- Scrape the firebox floor and flavorizer tray after each cook while the grill is warm, not hot.
- Deep clean the firebox at least four times a year with regular use.
- Never use water on a grease fire: smother a small one with baking soda and have a Class B extinguisher within reach.
The Bottom Line
Check the grease cup after every cook, scrape the firebox while it is warm and deep clean four times a year. Have the grill inspected before reuse if a grease fire reaches the burners or wiring.
Grease is the quiet cause of most outdoor grill fires, and it collects in the one place people look at last. The site's safety notice on grease fire prevention says the majority of grill fires come from accumulated grease in the catch system, not from equipment failure, which makes routine cleaning the most effective safety measure available. This guide covers DCS grill grease tray cleaning as a routine you can keep: how often to empty it, how to clean it without making a mess, and what to do if the grease does catch. For a wider cleaning routine for the whole grill, see how to clean a DCS grill.
| Task | How often | What it prevents |
|---|---|---|
| Empty the grease cup | Every two to three cooks, or when more than half full | Overflow onto the deck |
| Scrape the firebox floor and flavorizer tray | After each cook, while warm but not hot | Carbonized buildup that feeds flare-ups |
| Deep clean the firebox | At least four times a year with regular use | A sustained grease fire |
| Check clearance to combustibles | Before each use | Fire spreading to the deck or siding |
How Does the Grease System on a DCS Grill Work?
The notice describes a sloped grease management system that channels drippings away from the burners and into a removable grease cup. The cup is what most owners mean by the grease tray. When it is not maintained, grease builds up on the flavorizer tray, the burner shields and inside the firebox, and once that grease ignites it can produce a sustained flare-up that is hard to control.
So the cup is only the last stop. The real job is keeping the whole path clear from the cooking surface to the cup, and that is why the routine has a few steps rather than one. These are the places the notice says grease collects:
- The flavorizer tray — it sits closest to the heat and carries the heaviest film of drippings.
- The burner shields — grease baked onto them can smoke and flare when the burners are lit.
- The firebox floor and side walls — carbonized grease here is the sign of a routine that has slipped.
- The grease cup — the end of the path, and the only part that is meant to be emptied rather than scraped.
A quick look at each one with a torch before you light the grill takes under a minute and tells you where the next cleaning should start.
How Often Should You Empty and Clean the Grease Tray?
Empty the grease cup after every two or three cooking sessions, or whenever it is more than half full. That is the interval the notice gives, and it is easier to keep if you look at the cup each time you finish cooking rather than counting sessions.
The firebox needs more often. The notice says to scrape the firebox floor and flavorizer tray after each session while the grill is still warm, not hot, because warm grease scrapes away easily and cold grease sets. A deep clean of the entire firebox interior should happen at least four times a year if the grill is used regularly.
How Do You Clean the Grease Tray Safely?
Let the grill cool until it is warm rather than hot, switch the gas off at the supply, and work with gloves. A short routine covers the whole path:
- Turn off the burners and the gas supply — never work around a grill with the gas open.
- Scrape the firebox floor — push the loosened grease toward the drain opening with a scraper.
- Scrape the flavorizer tray — use a plastic or wooden scraper so you do not scratch or bend it.
- Slide out and empty the grease cup — tip the contents into a disposable container and bin it, not down a drain.
- Wash the cup in hot soapy water — dry it fully before it goes back.
- Fit a new liner — the notice suggests a foil liner or DCS-compatible grease cup liners to make disposal easier.
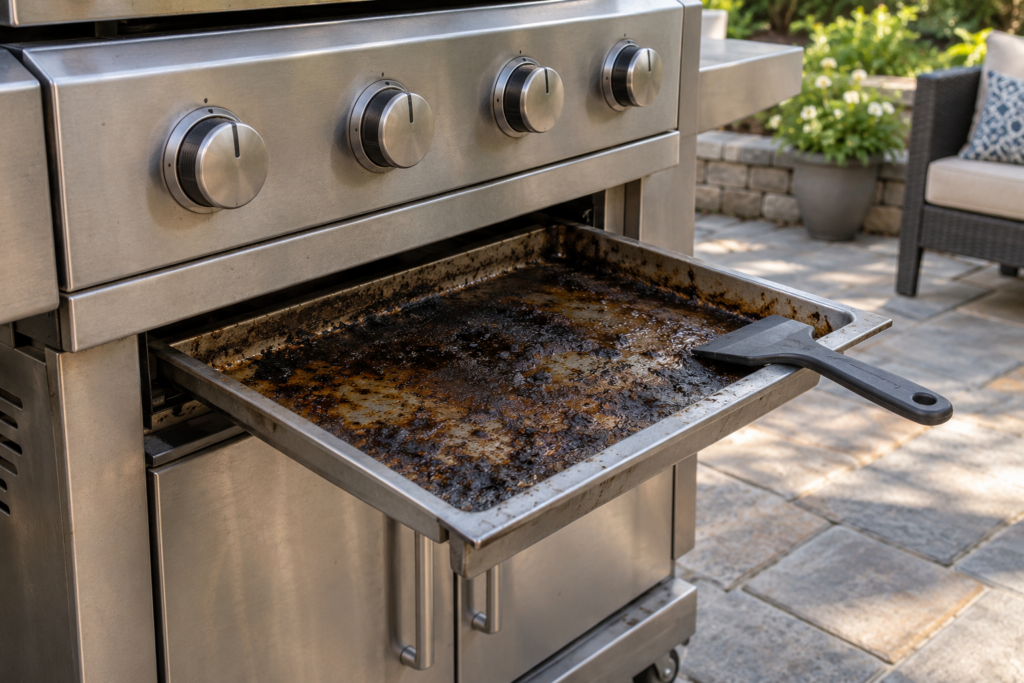
Scraping while the grill is warm is the habit that saves the most effort over a season. Grease that has gone cold and hard needs a deep clean to remove, and a deep clean is something you will put off. Five minutes after each cook keeps the next one out of reach.
Do not hose the inside of the firebox. Water carries grease to places it was not meant to be and soaks parts you want dry. Wipe, scrape and wash the removable parts instead.
What Should You Do If the Grease Catches Fire?
Never use water. The notice says to keep a box of baking soda near the grill to smother a small grease fire, and if a flare-up occurs, to move food to an unused grill zone and partly close the lid to reduce oxygen. The high-wind notice adds that a Class B fire extinguisher should be within reach when grilling in challenging conditions.
After a fire, do not simply clean up and carry on. The notice says that if a grease fire damages the burner tubes, igniter wiring or control valves, the grill should be professionally inspected before its next use, and it should not be used again after fire damage without clearance. Our grill repair service includes a full gas-circuit leak test before sign-off.
Warning Signs the Grease System Needs Attention
The notice lists the signs to watch for. Any of them means the routine has slipped and the next cook is a risk, so clean first.
- A full or overflowing grease cup — before or after cooking, it means the interval is too long.
- Black carbonized grease on the firebox — on the floor or side walls, it burns and smokes on the next heat-up.
- Smoke before food goes on — smoke from inside the cold-started grill means old grease is burning.
- Consistently large flare-ups — they point to buildup in the path, not a bad cut of meat.
- Grease dripping from the cabinet onto the deck — the system is overflowing and the deck is at risk.
Where the grill stands matters as well. The notice says to keep DCS grills at least 36 inches from any combustible surface and away from overhanging branches, eaves and umbrella structures. Check the surroundings before each use, not only the grill.
When to Call a Technician
Call when grease has reached the burner tubes, igniter wiring or control valves, or when flare-ups continue after a thorough clean. Those are signs of a damaged tray, a displaced component or a burner problem that cleaning does not cure. The final price is confirmed after on-site diagnosis, and diagnosis starts from $89, with a written estimate before work begins.
Our grill maintenance guide covers the seasonal routine, and the FLARE-UP code page explains what persistent flare-ups mean. When you need a visit, book it here or send us the model number and a photo of the firebox.